4.1 What is a workflow?
What does it take to do an analysis?
When you embark on some project, it’s helpful (but not necessary) to plan where you are going. It’s best to think about factors like:
- What data am I analyzing? What format is it in, and is that going to change? Will there be a lot more of this data that I want to process in the future?
- What kind of analyses do I want to do? What major steps do I have in my process? What work from others can I re-use and build upon?
- What do I want to generate? What is the desired outcome, and for whom is this intended?
In the author’s experience, bioinformatic workflows often involve reading in big (or many) flat files, processing the data into a useful form, sometimes using extra packages to analyze the data, then generating plots and statistical summaries of what you found - usually in an Rmarkdown-generated report.
So let’s start building up some good habits and skills!
4.1.1 Organizing files
Everyone’s got their own personal organizational systems, but usually everyone is operating on computers organized in a hierarchical file system. This paradigm organizes files into hierarchically nesting directories.
In at least this author’s experience, it is common practice to:
- use one folder per major chunk of work
- use subfolders such as
- data
- scripts
- tmp
- output
- write a README explaining what the project is and how to use it
There are many opinions on how to do this. The correct style is whatever works for you and your research community. Ask your supervisor.
–> Let’s go ahead and make an organized folder structure to work in <–
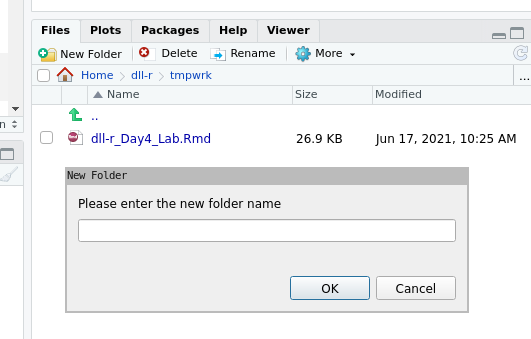
You can change files and such using RStudio. Go to the panel on the bottom right, and switch it to “Files” tab. You might see something like this:

a mostly empty directory
Go ahead and make a new folder, maybe call it “project”:

making new folder
Then, make folders to hold different types of files.
What folders should we make?
data, scripts, output is a good start.
Then, put a copy of the day5 worksheet in scripts folder.
You can move it however you like, using a folder, bash, or save-as.
Put that in the scripts folder.
4.1.2 Use a notebook to generate reports
Self-documented code means code that can be understood without an external
explanation.
You should probably do this with a code notebook.
rmarkdown is the premier tool for typesetting static notebooks, and it’s
simpler to setup, use, and distribute results from,
and is most commonly used by the R community.
4.1.2.1 Background about rmarkdown
The rmarkdown package was created by
Yihui Xie,
extending from previous work and ideas in
knitr and sweave.
It’s a way of mixing writing with code, such that you can run the code and it makes a pretty doc (and more).
Basically, it does this:
- Parses
.Rmdfiles to run the R code chunks, with appropriate chunk options, and saves the output of the R code along with the original text in a.mdfile. - Passes the
.mdfile topandocto turn this into an appropriate output, usually a HTML file.
rmarkdown is maintained by the RStudio company.
They generate
a lot of helpful “cheatsheets”
too.
4.1.2.2 Chunk options
You can set chunk-level options in an Rmd, for each code chunk. Such as:
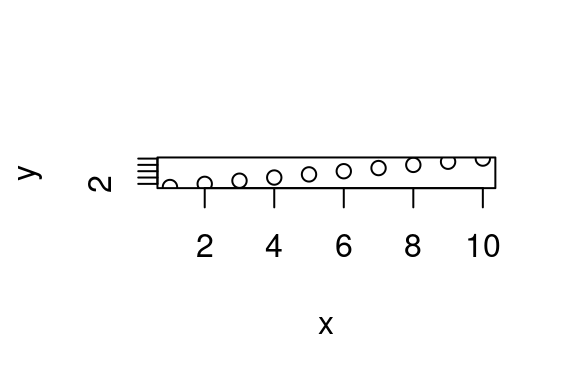
```{r, name_of_chunk, cache=T, fig.width=3, fig.height=2, error=F, warning=F, fig.align="right"}
x <- 1:10
y <- 1:10
plot(x,y)
```
This includes options like: - fig.width - fig.height - cache - echo - results - warning, message, and error
There’s a nice reminder list at the bottom of this doc.
One critically important one is cache.
This saves the outputs of code chunks in a file, so that each time you
re-render the document, it will check if the chunk is new.
If not, it’ll just load the outputs from last time.
I would recommend you use cache=T for any chunks with long computations.
Don’t use it for generated outputs while you’re modifying upstream variables,
as they won’t re-generate each time you run the notebook.
Similarly, I recommend you don’t cache loading libraries - these may not
load to be able to run the rest of the code.
```{r, name_of_chunk, fig.align="right"}
x <- 1:10
y <- 1:10
plot(x,y)
```4.1.2.3 Document options
You can set document-level options to. To do this, you create what’s called a YAML header, like so:
---
title: "Titled"
author: "yours"
---
You need three hyphens to open and close it. Put it at the very beginning. You can define quite a few options, including themes, like so:
---
title: "Titled"
author: "yours"
output:
    html_document:
        theme: yeti
---
Note that it (theme: yeti) has to be indented after html_document:,
indented after output:.
For more info and practice about YAML, see this YAML parser to see what YAML you are actually writing.
See more themes, and options, here.
Licensed Creative Commons Attribution-NonCommercial-ShareAlike 4.0